Prepping Rye Berries for Grain Spawn
Introduction
In this blog post, we will be teaching you the proper steps to clean, hydrate, and sterilize rye berries to use as spawn for gourmet mushroom colonization. Most species of gourmet mushrooms can be effectively grown on rye berries via liquid cultures or from pieces of colonized agar. In fact, it’s the most common grain spawn used to grow mushrooms at home and they are often considered as the gold standard for mushroom spawn. Besides their ability to absorb lots of water and their high nutrient content, rye berries are also so commonly used because they’re widely available and easily accessible to most people
What are rye berries? As you could probably guess from the name, they’re the whole grain that comes from Rye. Rye is a cereal grain that is different from ryegrass. It’s very closely related to wheat and barley. The berries are jam packed with fiber, protein, minerals, and vitamins. Because of this as well as their mild, nutty flavor they have a wide variety of uses including: flour, bread, beer, some whiskeys and vodkas, animal feed, and of course mushroom cultivation.
But what makes rye berries so delicious to mushrooms? Well, first it’s because the berries can absorb a lot of water; a single rye berry can triple in size/mass after it has fully soaked up water. Mushroom fruits themselves have an average water content of ~90%, and all of that will come from the water available during the colonization phase. With that being said, having well hydrated spawn is absolutely essential to healthy mycelial and mushroom growth. And second, they are full of nutrients that are necessary for fast, healthy growth. Rye berries are preferred over using other grain spawns such as corn kernels, brown rice, or birdseed because their nutrient content is much higher.
Before beginning this process, it is important to remember that if you plan on consuming your mushrooms you should buy 100% organic rye berries and also ensure that they are cleaned properly. The mycelium can absorb any pesticides or fertilizers that were used on the berries which can lead to a mushroom fruit that is not fit for human consumption. If the berries aren’t rinsed of dirt, sticks, dust, or other impurities then it can cause contaminations during colonization.
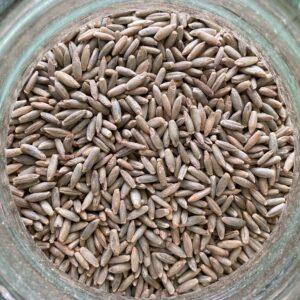
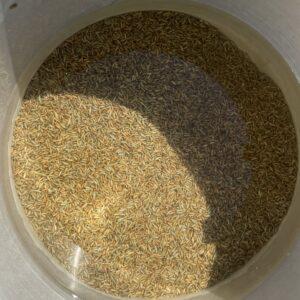
Dry rye berries
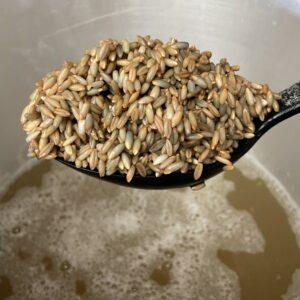
Hydrated rye berries
Materials:
- 100% organic whole rye berries (amount needed is dependent on how much spawn you want to make)
- 5 gallon bucket or other large container (needs some sort of lid or cover as well)
- Large spoon or spatula
- Strainer
- Gypsum
- Pressure cooker
- Stove
- Aluminum foil
- Mason jars or unicorn bags
- If using mason jars be sure you have modified lids that have both an injection and breathing port
- If using unicorn bags you will also need micropore tape
Tips Before Starting
- Be sure to purchase 100% organic WHOLE rye berries (do not purchase rye seeds, chopped rye, rye flakes, or rye flour)
- The whole process can take 24 hours or more to complete (some steps are more of a waiting game rather than hands on) so be sure that you plan ahead
- There are 6 main steps to preparing the rye berries: Rinsing, Soaking, Cooking, Drying, Loading, and Sterilizing
- You will need space to to rinse and dry the rye berries. Rinsing can be done outside and drying is best done indoors so be sure to have a cleared table or space on the ground for this
- NOTE: In the instructions, the terms “grains” and “rye berries” are used interchangeably
- If after reading through, you realize you don’t have the time, or some of the necessary materials, such as a pressure cooker, be sure to check out Brown Treasure! They have quality spawn and substrate already cleaned, hydrated, sterilized, and ready for use! Use code “SONORAN15” for 15% off your order!
Rinsing:
- Measure out the grains you’ll be using. Keep in mind that they’ll triple in size/volume after they’re finished soaking. If you intend to make 3 quarts of spawn then you will need approximately 1 quart of dry rye to start
- TIP: It’s always a good idea to add some extra dry grain as you will likely lose some along the way. It’s always better to overestimate than to under estimate
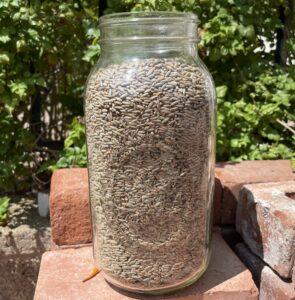
One 64oz mason jar (~3lbs) filled with dry rye berries
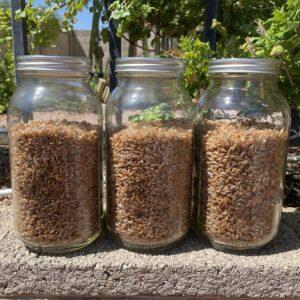
will produce three 64oz mason jars that are filled 3/4’s of the way full.
- TIP: It’s always a good idea to add some extra dry grain as you will likely lose some along the way. It’s always better to overestimate than to under estimate
- Begin the rinsing process by putting the dry grain you just measured out into the 5 gallon bucket. Fill the bucket with cool water (sink or hose water is just fine for this) until the berries are fully submerged a couple of inches under the water
- Stir the grains around using a large spoon or spatula until the water becomes silty and murky
- The rye berries are naturally very dusty and dirty due to the growth, harvest, and storing process. This is a reason why a thorough rinse is vital
- You may notice some rye berries floating on the top of the water- do your best to scoop these out. These floating rye berries likely did not develop properly and are mostly filled with air rather than the nutrients your mushrooms will crave
- Once the water is looking really dirty, it’s time to dump it out. Use a strainer to catch the rye berries as you dispose of the dirty water
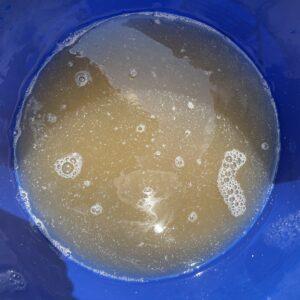
Dirty water from cleaning the rye berries
- Pour the grains in the strainer back into the 5 gallon bucket and refill with fresh water
- Repeat steps 1-4 at least two or three more times
Clear water after about 4 rounds of rinsing.
- OPTIONAL: After the final pour, thoroughly rinse the grains while still in the strainer (with hose or sink). You can use your hands to mix them around and really make sure you get any dirt or debris that may still be caught in them
Soaking:
- Pour the grain back into the 5 gallon bucket
- Fill the bucket back up with water until the rye is submerged under 3-4 inches of water
- NOTE: The amount of water is important because while the grains are soaking, they will begin to absorb a lot of water. You want to make sure that there’s enough water in the bucket for all of the grains to become fully hydrated
- Add ~1 to 1.5 tablespoons of gypsum per quart of dry grain used to the water and mix
- Gypsum is added to the mix for a few reasons. First, it will help prevent the rye berries from sticking together. Second, it’s also a great calcium additive that won’t affect the pH of the mix. Gypsum has been proven to improve colonization times
- Cover the 5 gallon bucket with a lid and let soak for 12-24 hours
- NOTE: You MUST soak the grains for at least 12 hours for two reasons. One, this will allow plenty of time for them to hydrate. Tw0, this will allow time for any endospores to germinate and become more susceptible to heat sterilization (via pressure cooker). Many endospores can survive pressure cooking which is why you want to allow them to germinate before doing so. And you don’t want to wait longer than 24 hours because the grains will eventually go bad just sitting in the water.
Cooking:
- After the grains finish soaking for 12-24 hours, they’re ready to be cooked on the stove. Using the same water you soaked the grains in, brint it to a light boil while stirring occasionally
- As soon as the water begins to boil, reduce the temperature to a simmer
- Allow the grains to simmer for about 10-12 minutes while still stirring occasionally
- NOTE: Keep a close eye on the rye berries while they’re simmering. You don’t want them to over hydrate and burst open. Bursted berries will increase the risk of contamination during colonization. It’s fine if a few burst open, but it is best to limit this as much as possible. The best way to avoid bursting is by making sure the temperature isn’t too hot and not allowing them to simmer for more than 12 minutes.
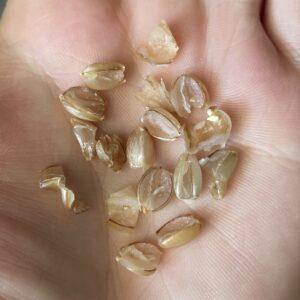
Bursted rye berries
- TIP: This is a good time to set up your drying station for the next part of the process. Clear off a table ot some floor space and lay out some aluminum foil for the rye berries once they’re done simmering
- NOTE: Keep a close eye on the rye berries while they’re simmering. You don’t want them to over hydrate and burst open. Bursted berries will increase the risk of contamination during colonization. It’s fine if a few burst open, but it is best to limit this as much as possible. The best way to avoid bursting is by making sure the temperature isn’t too hot and not allowing them to simmer for more than 12 minutes.
- Once the grains are done simmering for 10-12 minutes they should be nice and plump with water. Move quickly and pour out the water, using a strainer to catch the grains
- WARNING: At this point the grains will be HOT so be careful during this step
- TIP: The water you’re dumping is great for watering houseplants or your garden, once it cools
Drying:
- Shake the strainer with the wet grains to try and remove as much excess water as possible
- After shaking out excess water, pour them out on the aluminum foil you have set up. Spread the grains into a thin layer on the foil
- WARNING: They will still be HOT during this step so be careful. Keep in mind that steam is actually a good thing as that is excess water evaporating off of the grains
- TIP: If you have a portable fan you can set it up and point it at the drying grains to help speed up the drying process
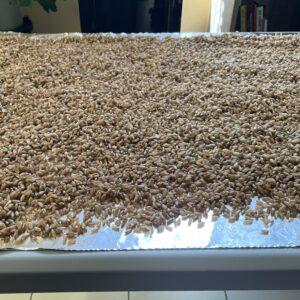
Rye berries spread out to dry after cooking
- Allow approximately 30 minutes to 1 hour for the rye berries to dry and cool. Ideally, they should dry so that all of the water is evaporated from the exterior, while the interior is still plump and full of water
- Not sure if they’re are dry enough? Use the toilet paper test!
- TOILET PAPER TEST: Take a piece of toilet paper and place some of the grains on it. If they leave a wet spot on the toilet paper, then they’re still too wet and will need more time to dry. If they don’t leave a mark then they’re ready to move onto the next step
Loading:
Loading Mason Jars
- Fill the mason jars with the now hydrated rye berries until they’re 3/4 of the way full
- NOTE: You want to leave 1/4 of the jar empty so you will have room to shake and break up the colonized grains later. If you completely fill the jar you will not be able to break them up later once they colonize
- Put on the modified jar lids that have an injection and breathing port
- Wrap a layer of aluminum foil over the top of the jar lid to cover both the injection and breathing ports. This prevents any water and steam from the sterilization process from seeping into the jar and disrupting the water content inside.
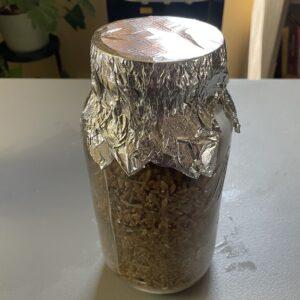
Grain jar with foil over the lid before it goes into the pressure cooker
Loading Unicorn Bags
- Fill the unicorn bags with your desired weight of the now hydrated rye berries. The most common weights are 3 and 5 pound grain spawn bags
- Once the bag is filled with the desired amount of grain, fold the top over itself and tape it down using the micropore tape. This prevents any water and steam during the sterilization process from seeping into the jar and disrupting the water content inside
- Wrape the entirety of the filled unicorn bag with a layer of aluminum foil. This will protect the bags from melting to each other in the pressure cooker
Sterilizing:
- Place the filled mason jars or unicorn bags into the pressure cooker and put the top on
- Turn on the stove and bring the pressure cooker to 15 PSI for 90 minutes
- NOTE: Do NOT start the 90 minute timer until the pressure cooker reaches 15 PSI. If it dips below 15 PSI, pause the timer and then resume it once the pressure reads 15 PSI again.
- Once the 90 minute timer goes off, turn off the stove immediately. You do not to burn or dehydrate the grains
- NOTE: Once the stove is off, let the heat and pressure release naturally from the pressure cooker. DO NOT remove the pressure regulator or lid to let out the pressure
- Allow everything to cool for 8-12 hours
- Once everything has cooled, they’re ready for incoulation!